Testing PHP
To test whether PHP is installed and working, follow these steps:
- Find the directory in which your PHP programs need to be saved.
This directory and the subdirectories under it are your Web space. Apache calls this directory the document root. The default Web space for Apache is htdocs in the directory where Apache is installed. For IIS, it’s Inetpub\wwwroot. In Linux, it might be /var/www/html. The Web space can be set to a different directory by configuring the Web server. If you’re using a Web hosting company, the staff will supply the directory name.
- Create the following file somewhere in your Web space with the name test.php.
<html>
<head>
<title>PHP Test</title>
</head>
<body>
<p>This is an HTML line
<p>
<?php
echo “This is a PHP line”;
phpinfo();
?>
</body></html>
The file must be saved in your Web space for the Web server to find it.
- Run the test.php file created in Step 1. That is, type the host name of
your Web server into the browser address window, followed by the name of the
file (for example, www.myfinecompany.com/test.php).
If your Web server, PHP, and the test.php file are on the same computer that you’re testing from, you can type localhost/test.php.
For the file to be processed by PHP, you need to access the file through the Web server--not by choosing File-->Open from your Web browser menu.
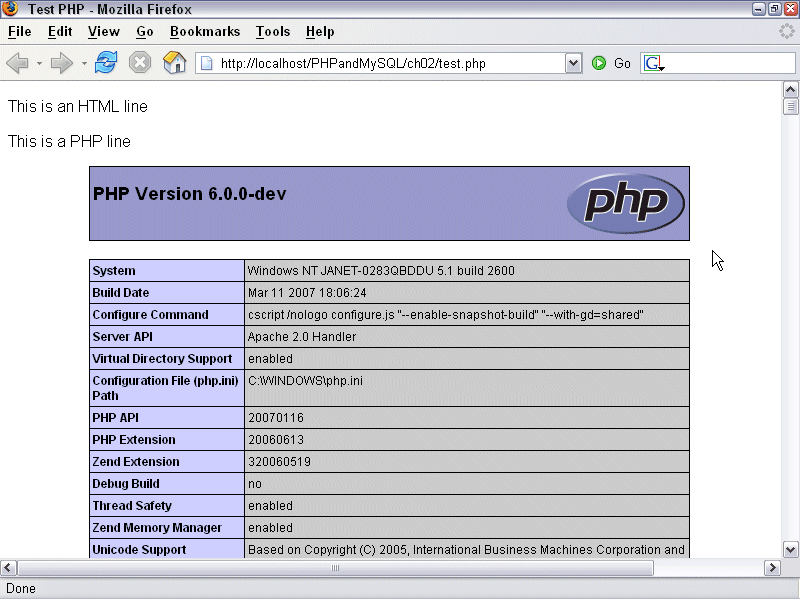
Figure 2-1: PHP settings
The output from the test.php program is shown in Figure 2-1. The output shows two lines, followed by a table. The table is long and shows all the information associated with PHP on your system. It shows PHP information, pathnames and filenames, variable values, and the status of various options. The table is produced by the phpinfo() line in the test script. Anytime that you have a question about the settings for PHP, you can use the phpinfo() statement to display this table and check a setting.
If you see only a blank page or only the first line and not the second line and the table of settings, see Troubleshooting.