Installing phpMyAdmin
To create and administer MySQL databases, you need to use database administration software. The most popular MySQL administration software is phpMyAdmin. It's written in PHP and runs in the browser. It provides a user interface that greatly simplifies your interactions with MySQL.
phpMyAdmin is a free, open-source Web application written in PHP. You can download and install phpMyAdmin on your local machine to access MySQL databases on your machine or on other machines over a network. Most Web hosting companies provide phpMyAdmin for you to use when accessing your databases on their computers.
You must install MySQL and PHP before you can install phpMyAdmin. If you installed XAMPP, phpMyAdmin was probably installed during the installation process. If you intalled PHP and MySQL separately, you must install phpMyAdmin separately. The following sections provides instructions for downloading, installing, and testing phpMyAdmin by itself, after you have installed your Web server, MySQL, and PHP.
Obtaining phpMyAdmin
You can obtain phpMyAdmin by downloading it from the phpMyAdmin Web site. Follow these steps:
- Go to www.phpmyadmin.net.
- Locate the box in the upper left corner with the heading Quick Downloads.
- Click the Zip link under the entry Latest Stable Version.
A file downloads named phpmyadmin-version-all-languages-utf-8-only.zip. (For example, the file name for version 2.10.3 would be phpmyadmin-2.10.3-all-languages-utf-8-only.zip.)
Installing phpMyAdmin
To install phpMyAdmin, you unzip the file you downloaded and you store the files in the directory where your Web server looks for Web page files (the document root). You then configure phpMyAdmin to communicate with your MySQL installation. To install phpMyAdmin, follow these steps:
- Change to the directory where you stored the downloaded phpMyAdmin file.
- Extract the files from the .zip file into the directory where your Web server looks for the Web page files.
If you double-click the zip file, it should open in the software on your computer that extracts files from Zip files, such as WinZip or PKDZIP. Select the menu item for the eExtract command and select the directory into which the files are to be extracted.
phpMyAdmin should be extracted into the directory where your Web server looks for Web page files. The default document root directory for Apache on Windows is htdocs in the directory where Apache is installed; if you changed the default Apache document root, extract phpMyAdmin files into the new document root. The default directory for IIS is Inetpubs\wwwroot. In Linux, it might be /var/www/html.
After the files are extracted, you have a directory with the same name as the Zzip file, such as phpmyadmin-2.10.3-all-languages-utf-8-only. The directory contains several subdirectories and files. - Change the directory name to phpMyAdmin.
- Change to the new directory.
For example,
cd phpMyAdmin.
- Create a new folder and name it config.
- Start a browser and go to http://localhost/phpMyAdmin/scripts/setup.php.
The phpMyAdmin setup Web page appears, as shown in Figure 3-5.
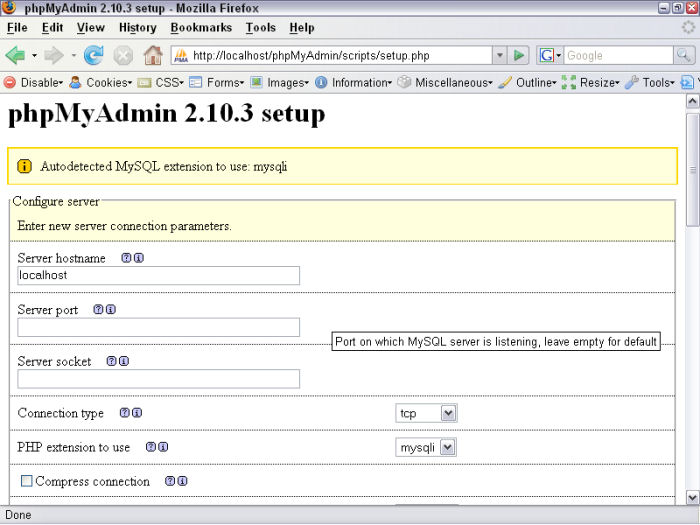
Figure 3-5: The phpMyAdmin Setup Web page.
- Scroll down to the Configuration section and click the Save button.
A configuration file named config.inc.php is now saved in the config directory that you created in Step 5. The message File Saved appears at the top of the Web page. However, this configuration file is still empty. - Click the Add button in the Server section.
The Add Server section of the Web page appears, as shown in Figure 3-6.
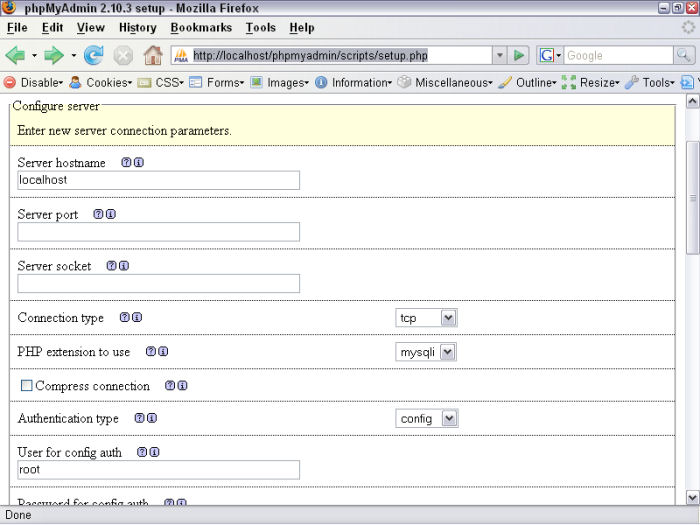
Figure 3-6: The phpMyAdmin Add Server Web page.
- Type a name in the Server Hostname field.
In most cases, you can type localhost. - Type root in the Account Name field.
- Type the password for the root account in the Password field.
This is the password that you created for root when you installed MySQL. - Click the green Add button at the bottom of the Add Server section.
- Scroll down to the Configuration section and click the Save button again.
The server that you just added is saved in the configuration file. The File Saved message displays again. - Copy the config.inc.php file from the config directory into the phpMyAdmin directory.
Testing phpMyAdmin
After you install phpMyAdmin, you want to test it to ensure that it installed properly and is working correctly. To test phpMyAdmin, open a browser. Go to the index.php file in your phpMyAdmin directory. For example, you might type:
localhost/phpMyAdmin/index.php
The phpMyAdmin main Web page appears. It displays information about your MySQL installation, such as its version. Figure 3-7 shows the phpMyAdmin main Web page.
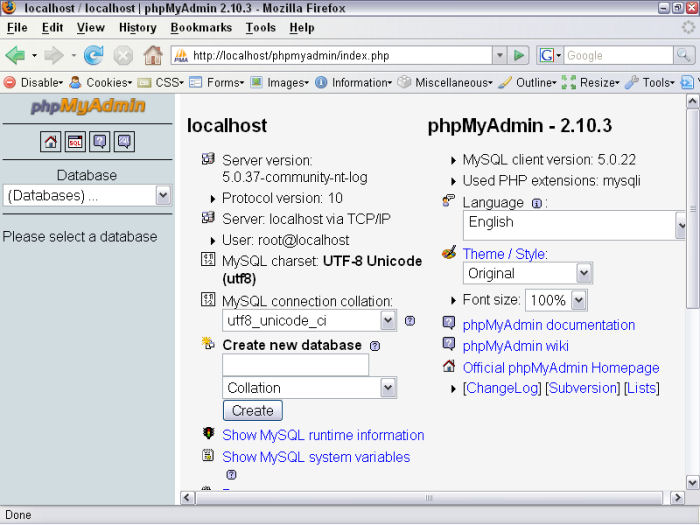
Figure 3-7: The phpMyAdmin Main Web page.
Notice that the left pane shows a field named Databases. The drop -down list contains all the databases that currently exist.
The top of the left column in the main section of the Web page shows the version of the MySQL server that is running. Below that, the page shows which user is running phpMyAdmin, (in this case, root).
phpMyAdmin allows you to administer your MySQL databases.
Troubleshooting phpMyAdmin
When you test phpMyAdmin, you might see an error message similar to the error message shown in Figure 3-8.
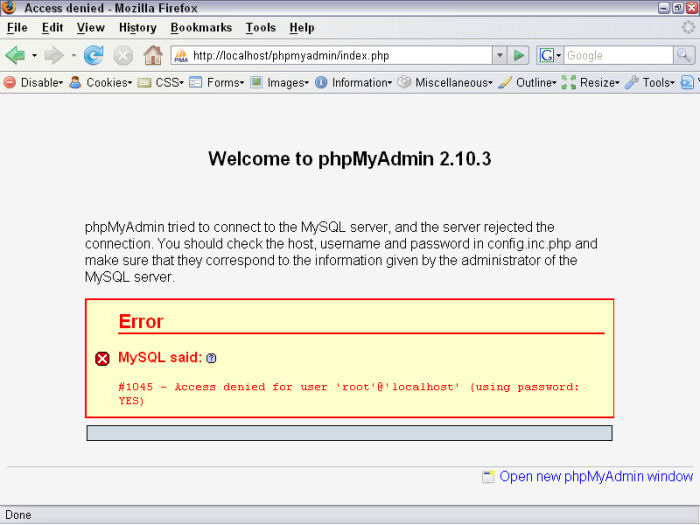
Figure 3-8: A phpMyAdmin Error Message.
This error message states that phpMyAdmin access to the MySQL server is denied to the user specified in the phpMyAdmin configuration file. In most cases, the problem is an incorrect account name or password. You can see what your current account name and password are by viewing the config.inc.php file located in the phpMyAdmin directory.
Open the configuration file in a text editor. Scroll down to the section for your server that looks similar to the following:
/* Servers configuration */
$i = 0;

/* Server localhost (config:root) [1] */
$i++;
$cfg['Servers'][$i]['host'] = 'localhost';
$cfg['Servers'][$i]['extension'] = 'mysqli';
$cfg['Servers'][$i]['connect_type'] = 'tcp';
$cfg['Servers'][$i]['compress'] = false;
$cfg['Servers'][$i]['auth_type'] = 'config';
$cfg['Servers'][$i]['user'] = 'root';
$cfg['Servers'][$i]['password'] = 'secret';

/* End of servers configuration */
Check that the parameters are correct. The account name in this file is root, and the password is secret. If any parameters are incorrect, edit the file to correct them. Save the file and restart phpMyAdmin again.
Notice that the error message in Figure 3-8 includes a small question mark (?) after the heading. If you click the question mark, the appropriate MySQL documentation page opens.